MIDI Configurations
MIDI configurations are files that allows P44D5 to know how to interpret the MIDI messages that your MIDI controller will send to it. Those configurations are relatively simple but very important for the good operation of P44D5.
File type
The configurations have the default extension ".cnfmidi" but they are simply JSON files with the following attributes:
Invalid configuration
If the configuration is invalid, it won't be able to be loaded, but it can still be created.
If you ever have trouble loading a configuration, ensure that it has a "pad_mode" value of either note or control_change, and that it has a positive integer value in the field base note offset, as well as in the id_knob_XXX fields and pot_max_value. More info.
Create a MIDI configuration
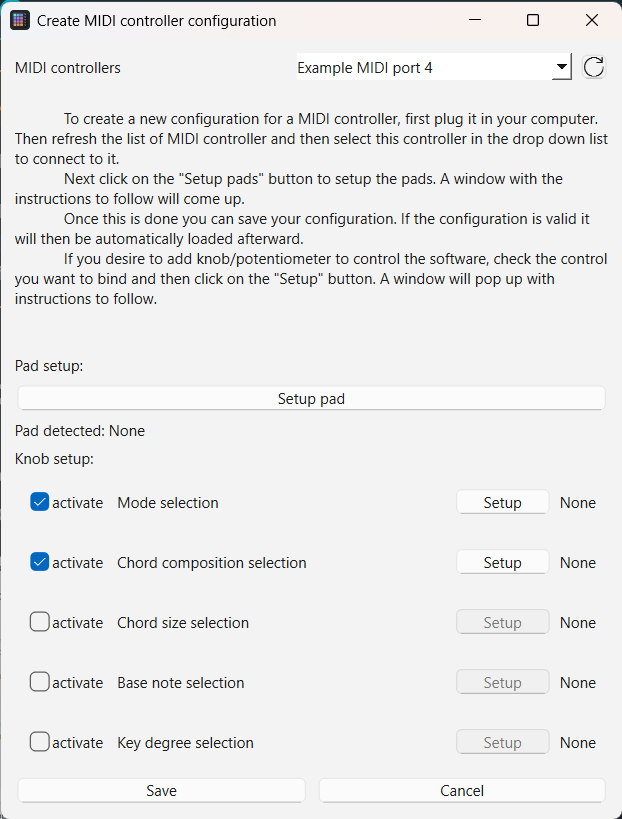
To create a new MIDI configuration click on the new button  on the left of the top bar. This will open the window shown below.
Setup the pads
To setup the pads, click on the setup button in the setup pad section. Wait for the following pop-up to display.
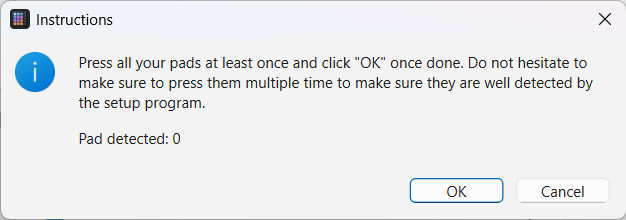
Once it is displayed, simply press all your pads. The most important is to be sure to press the pad with the lowest id in the MIDI controller. If you don't know which one it is, simply press all your pads. Don't hesitate to press them multiple times each to make sure they are detected by the software. A number indicating the number of pad detected will help you know if you the pads were detected as you pressed them.
Pad detection
The pad detection also detect knob movements and interaction you can have with other physical control of your MIDI controller. To ensure accurate pad detection, be careful to only interact with the pads of your MIDI controller during setup.
Setup the dials
To setup dials, simply tick the checkmark corresponding to the function you want to associate a dial with. This will enable the corresponding setup button. Click on the setup button and wait for the pop-up shown below to appear.
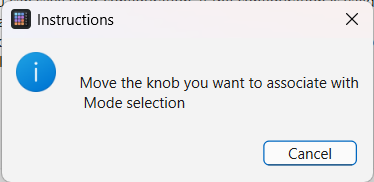
Once this pop-up appear, move the knob you want to associate with the function. Once the knob has been detected, the pop-up will disappear and you will be able to see the id of the detected dial to the right of the setup button you just clicked.
Once your pads and dial are set, simply save your configuration by clicking the save button at the bottom of the window.
Load a MIDI configuration
To load a MIDI configuration click on the open button  on the left of the top bar. A file picker will pop-up to let you choose your configuration file. The bottom bar will indicate if the configuration load was a success or a failure. If it is successful, the name of the configuration file will be displayed to the right of the bottom bar.